vCenter 6.0 Appliance Multi-NIC
Introduction:
Occasionally it's useful to connect vCenter to multiple networks simultaneously. Often this requirement comes from in-band (IB) vs out-of-band (OOB) networking where some provisioning or automation tool requires access to vCenter.
The problem is that these provisioning tools often run on a dedicated OOB network, where servers running ESXi (and therefore vCenter) reside in-band.
Note: This guide is written for vCenter 6.0 only! 6.5 is different!
Getting Started:
vCenter server is build on linux, therefore it generally follows standard linux procedures when it comes to adding another NIC.
For the purposes of this guide, the second NIC will be added for L2 connectivity only. Routes could be added but is beyond the scope of this guide.
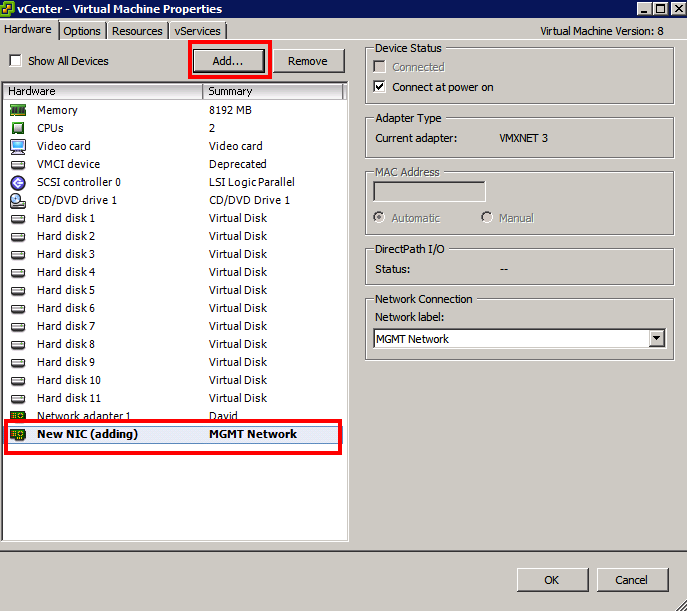
Step 1:
Add a new NIC to the vCenter appliance:
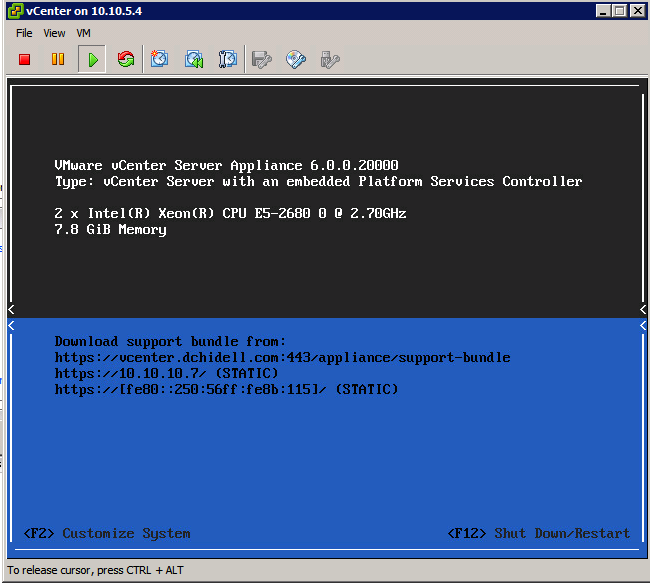
Step 2:
We'll do all of this on the vCenter console - you could SSH but this is just easier.
Connect to vCenter console:
Step 3:
Now Press ALT+F1 which will switch you to a linux login prompt, log in with the root credentials
Step 4:
Enter the following, this should take you to a bash prompt:
shell.set --enabled True
shell

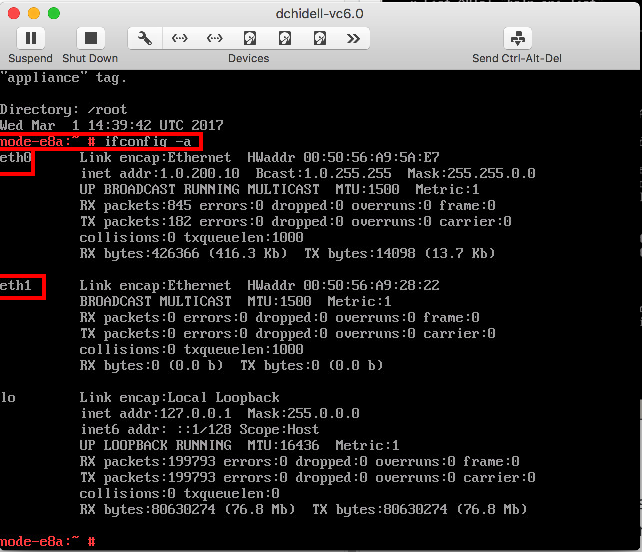
Step 5:
(I had to switch vCenter servers after this - the old one was configured differently so the screenshots look a bit different).
We can now see the interfaces we have using ifconfig -a, and can see that we have two NICs present:
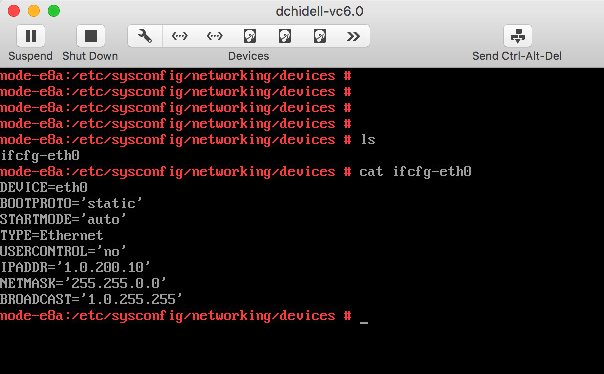
Step 6:
The network interface configuration is stored in a file in the /etc/sysconfig/networking/devices directory. We can see the existing configuration for eth0 in here:
Make a copy of this file and call it the same as the new interface number. If this is the first time you're doing this, the new NIC should be eth1:
cd /etc/sysconfig/networking/devices
cp ifcfg-eth0 ifcfg-eth1
Step 7:
Edit the new ifcfg-eth1 file and enter the information for the new network.
vi ifcfg-eth1
Make sure to change the following fields:
DEVICE (this should match the hw device i.e. eth1)
IPADDR
NETMASK
BROADCAST
Step 8:
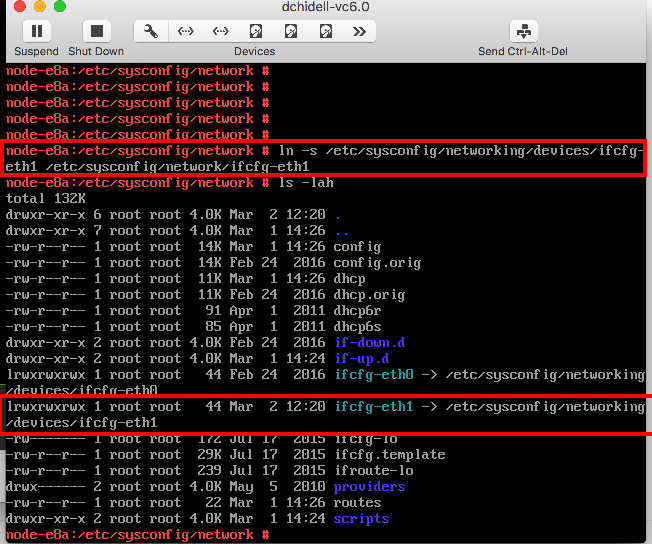
Now we need to create a symbolic link to this file from another location. This is so the network scripts can pick up the interface definition. We could probably have created the file here but since ifcfg-eth0 uses a sym link we should stick to the 'proper' way of doing it.
ln -s /etc/sysconfig/networking/devices/ifcfg-eth1 /etc/sysconfig/network/ifcfg-eth1
Step 9:
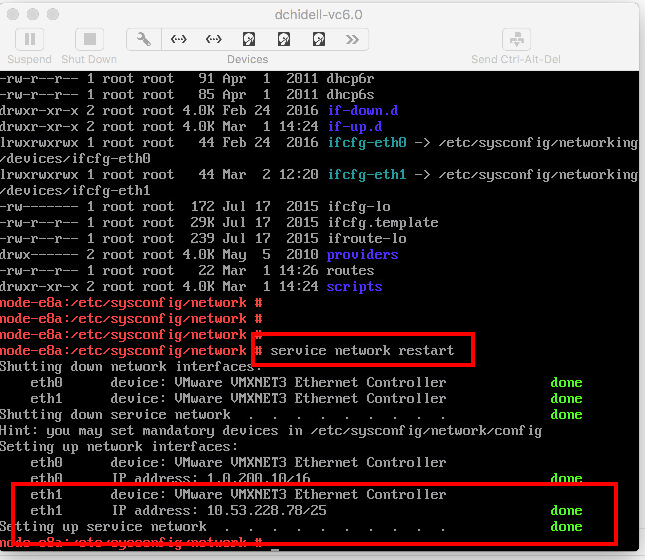
Restart networking services:
service network restart
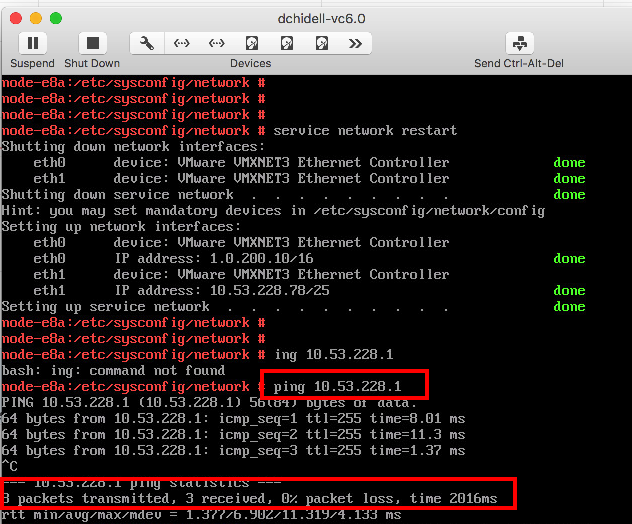
Step 10:
Test it! It works!
Command Summary:
#Enable Bash shell
shell.set --enabled True
shell

#Create copy of existing interface file and edit it
cd /etc/sysconfig/networking/devices
cp ifcfg-eth0 ifcfg-eth1
vi ifcfg-eth1

#Create sym link to network directory
ln -s /etc/sysconfig/networking/devices/ifcfg-eth1 /etc/sysconfig/network/ifcfg-eth1

#Restart networking services
service network restart